Friday, December 20, 2019

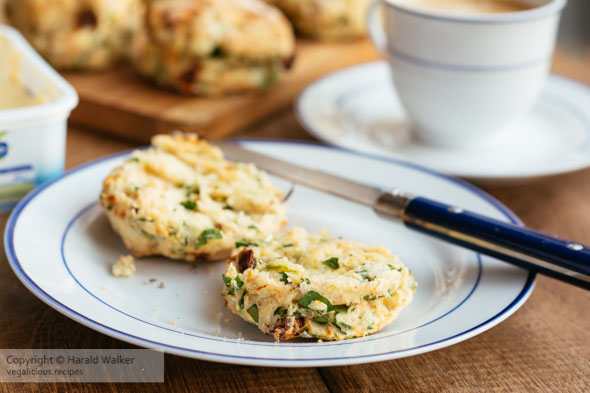
Spinach and Sun-dried Tomato Biscuits

With the holidays coming up, baking powder biscuits are so versatile and always tasty. We enjoyed this variation using spinach and sun-dried tomatoes.

Spinach and Sun-dried Tomato Biscuits

Yield: 8-12 biscuits

Ingredients:

  • 2 cups AP flour
  • 1 tablespoon baking powder
  • ½ teaspoon salt
  • 4 tablespoons vegan margarine
  • handful l baby leaf spinach
  • sun-dried tomatoes
  • ¾ cup soy yogurt or non-dairy milk

Spinach and Sun-dried Tomato Biscuits

Directions:

  1. Preheat the oven to 450°F/232°C.
  2. Wash, spin dry and roughly chop the spinach.
  3. Cut the sun-dried tomatoes in small pieces.
  4. Place the flour in a large bowl.
  5. Add the baking powder and salt and stir a bit.
  6. Cut in the vegan margarine and mix until the mixture breaks down like sand particles. I do this by hand, it goes quickly and is not really that messy to do.
  7. Add the spinach and cut tomato pieces and gently mix.
  8. Add the soy milk and stir until the mixture clings together.
  9. Turn out onto a floured bread board or countertop and knead for 1 or until the dough is smooth.
  10. Add more flour as needed if the dough is sticky. Be careful to not over-work the dough.
  11. Roll the dough out to about a ½-inch thickness.
    The biscuits do not rise much, so don’t roll the dough out to thinly.
  12. Using a juice glass, dipped in flour at the rim, cut the dough into rounds
  13. Place on an un-greased cookie sheet, and bake for 12 to 15 minutes.
  14. Serve hot.


from Vegalicious https://ift.tt/2PJhult
via Why You Should Consider Buying Organic Food

Friday, December 13, 2019

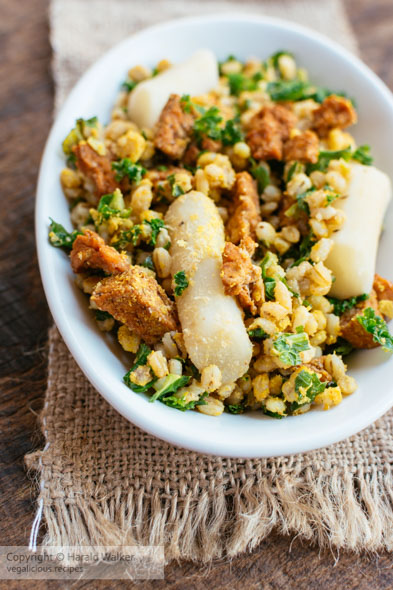
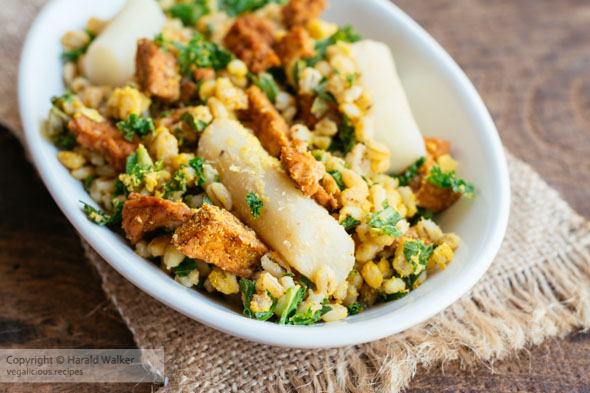
Salsify with Pearl Barley, Kale and Spicy Tofu Pieces

Salsify is one of our favorite winter vegetables. It is very mild in flavor, rather like white asparagus. We really enjoyed this meal using the salsify with barley in a risotto way.

Salsify with Pearl Barley, Kale and Spicy Tofu Pieces

Serving Size: 4

Ingredients:

  • 8 black salsify roots
  • 1 tablespoon lemon juice
  • 2 cloves garlic
  • 1 tablespoon olive oil
  • 1 cup pearl barley
  • 1 quart vegetable bouillon (divided)
  • 2-3 cups kale, chopped
  • 8 ounces prepared spicy tofu pieces
  • 2 tablespoons nutritional yeast
  • 4 ounces vegan cheese, grated
  • salt and pepper to taste

Salsify with Pearl Barley, Kale and Spicy Tofu Pieces

Directions:

  1. Peel the salsify under running water (so that way your hands will not become sticky from the sap).
  2. Cut the salsify roots into bite sized pieces.
  3. Heat a large frying pan and add the olive oil.
  4. Place the salsify in the oil and lightly brown.
  5. Meanwhile, heat a medium saucepan.
  6. Add 1 tablespoon oil and the 1 cup of pearl barley.
  7. Toast the barley stirring for 3 minutes.
  8. Add 2 cups of vegetable bouillon to cook the barley.
  9. Turn the heat down to medium and allow the barley to cook.
  10. Add 1 cup of vegetable bouillon to the cooing salsify.
  11. Turn the heat down and place a plate or lid on the frying pan to allow the salsify to simmer for about 10 minutes.
  12. When the salsify are soft, and the barley has cooked to soft grains, drain any extra water off.
  13. Add the barley to the salsify and stir to mix well.
  14. Add the spicy tofu pieces.
  15. Add the kale and stir to mix.
  16. Add the nutritional yeast and the grated vegan cheese.
  17. Sprinkle the mixture with the lemon juice.
  18. Season to taste with salt and pepper.


from Vegalicious https://ift.tt/2YJOVXK
via Why You Should Consider Buying Organic Food

Sunday, November 24, 2019

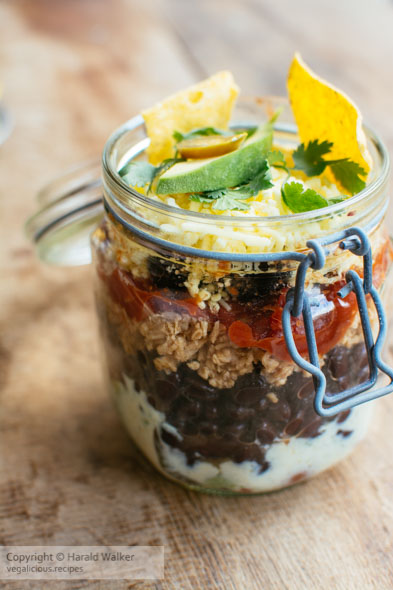
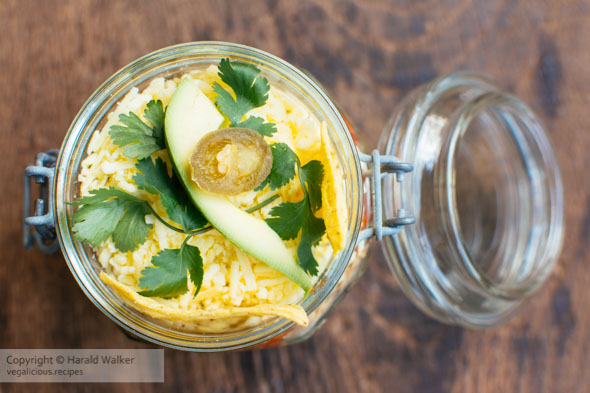
Taco Salad in a Jar

We’ve been enjoying salads in jars lately. They are a good way to transport a meal, as well as storing for a short time. One can make them ahead of time, and then enjoy at ones convenience.

Taco salad in a jar

Serving Size: 2

Ingredients:

for the creamy salad dressing:

  • ¼ cup olive oil
  • ¼ cup white balsamic vinegar
  • 1 teaspoon vegetable bouillon powder
  • 1 tablespoon maple or agave syrup
  • ¼-½ jalepeno, de-seeded and minced
  • ¼ cup soy yogurt
  • salt and pepper to taste

for the salad:

  • Mixed salad greens, washed and spin dried
  • 12 Cherry tomatoes, cleaned and halved
  • 1½ cups black beans, cooked and drained
  • 1 cup TVP (textured vegetable protein (also known as soy protein)
  • 1 cup boiling water to reconstitute the TVP
  • ½ cup non-dairy cheese, shredded
  • handful black olives
  • 1 avocado, peeled and sliced
  • 1 cup tomato salsa
  • 3 spring onions, sliced
  • taco chips
  • cilantro or coriander leaves as garnish

Taco salad in a jar

Directions:

  1. to make the dressing:
    1. Mix together the olive oil, balsamic vinegar, vegetable bouillon powder and maple or agave syrup.
    2. Whisk to blend.
    3. Remove the seeds from a jalapeƱo and mince 1/4 of it, or more if you wish.
    4. Add to the dressing.
    5. Add the soy yogurt and again, whisk to blend.
    6. Season to taste with salt and pepper.
    7. Place 2-3 tablespoons of the dressing in the bottom of your jars.
  2. to make the salad:
    1. Place the TVP in a small bowl.
    2. Add the boiling water and allow the TVP to reconstitute for 3-5 minutes.
    3. Layer the various ingredients into the jar.
    4. We placed a layer of clean greens on top of the salad dressing, as the bottom layer of the salad.
    5. Then we added about 4 or 5 of the cherry tomatoes, cut in half.
    6. Next we layered 2-3 tablespoons of the black beans and then the sliced green onions.
    7. Followed with 2-3 tablespoons of the TVP.
    8. On top of the TVP we placed the tomato salsa with a few black olives on top of the salsa.
    9. We next layered the non-dairy cheese.
    10. On top of the non-dairy cheese, we placed some coriander or cilantro leaves, and avocado slices.
    11. We garnished the salad with a few taco chips and had a bowl of taco chips on the side.


from Vegalicious https://ift.tt/2OF9pfF
via Why You Should Consider Buying Organic Food

Friday, November 1, 2019

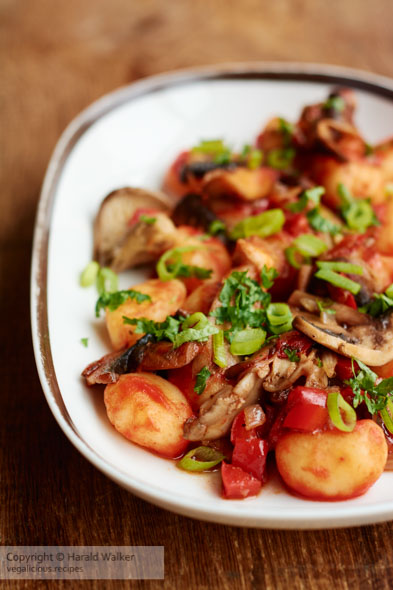
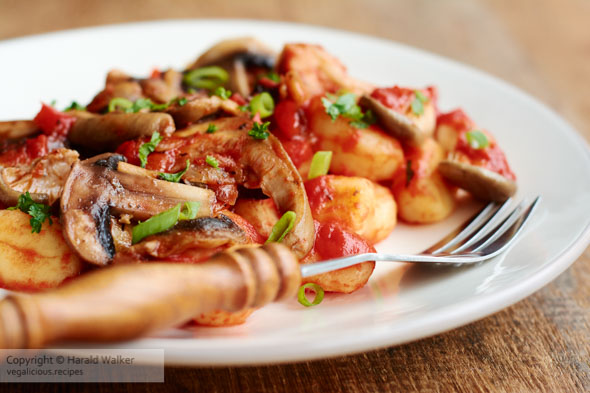
Mushroom Ragu on Gnocchi

This is such a handy meal to make. It’s quick and easy and filling. Great for cold winter’s nights. You can use any kind of mushrooms available and what you prefer. We have made our own gnocchi often, but we also keep remade packaged gnocchi on hand when there isn’t time to make gnocchi from scratch.

Mushroom Ragu on Gnocchi

Serving Size: 4

Ingredients:

  • 1 onion, chopped
  • 3 tablespoons cooking oil
  • 2 pounds mixed mushrooms, we used button and oyster mushrooms
  • 1 red bell pepper, de-seeded and chopped
  • 1 can crushed tomatoes, (about 1&1/2 cups)
  • 2 tablespoons tomato paste, ajvar or sriracha sauce
  • Italian herbs
  • 1/2 teaspoon ground coriander
  • 2 pounds gnocchi
  • chopped chives and parsley as garnish

Mushroom Ragu on Gnocchi

Directions:

  1. Clean the mushrooms by gently brushing them or using a paper towel. If the mushrooms are large, cut in half or quarters.
  2. Chop the onion.
  3. De-seed and chop the red bell pepper.
  4. Heat the oil in a large frying pan.
  5. Add the red bell pepper pieces to the oil and saute until the begin to soften.
  6. Add the onion pieces to the red bell peppers and saute until glassy.
  7. Bring a large pot of lightly salted water to boil to cook the gnocchi.
  8. Add the mushrooms and cook until soft.
  9. Add the crushed tomatoes and mix gently.
  10. Add the tomato paste or ajvar or sriracha sauce.
  11. Season to taste with salt, pepper and the Italian seasonings.
  12. Add the gnocchi to the boiling water.
  13. Cook the gnocchi until the begin to float.
  14. Drain the water from the gnocchi.
  15. Chop the chives and parsley
  16. Serve the gnocchi with the mushroom ragu on top and garnished with some chopped chives and parsley.


from Vegalicious https://ift.tt/2C1UGFP
via Why You Should Consider Buying Organic Food

Friday, October 18, 2019

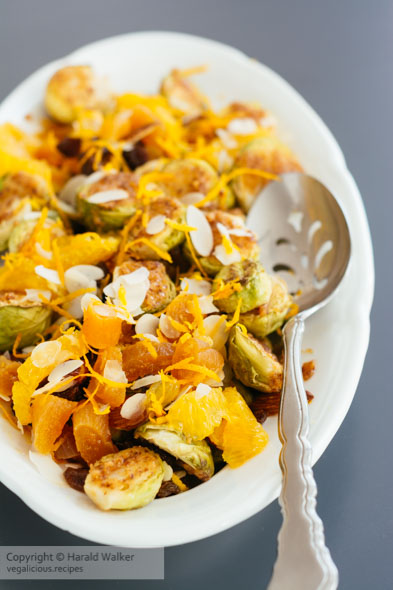
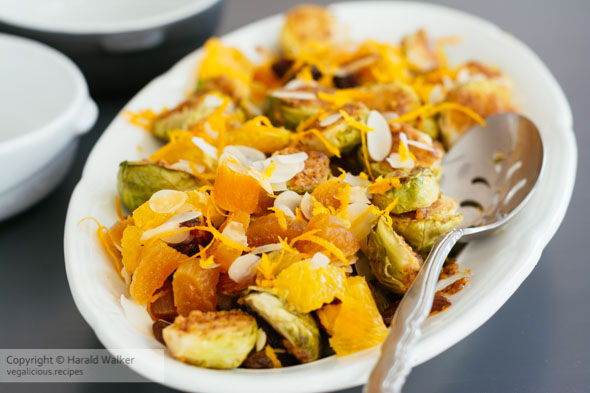
Roasted Brussels Sprouts with Maple Mustard Sauce, Apricots, Almonds, Raisins, Almonds and Oranges

Oh friends, this is a very special way to enjoy Brussels sprouts. It would make a great holiday side dish. The recipe makes 4 servings, but I would recommend making double the portion as most people would really ask for second servings.

Roasted Brussels Sprouts with Maple Mustard Sauce, Apricots, Rai

Serving Size: 4

Ingredients:

for the Brussels sprouts:

  • 2 pounds Brussels sprouts, cleaned the end trimmed off and cut in half
  • 6 tablespoons olive oil
  • 6 tablespoons maple syrup
  • 2 tablespoons grainy mustard
  • 1 pinch each salt and pepper

for the extras:

  • 4 ounces dried apricots, chopped
  • 2 ounces almond slices
  • 2 organic oranges
  • ½ cup raisins
  • 1 pinch each salt and pepper

Roasted Brussels Sprouts with Maple Mustard Sauce, Apricots, Rai

Directions:

  1. Pre-heat the oven to 375°F/190°C.
  2. Wash the Brussels sprouts, cut the stem end off and slice the sprouts in half.
  3. Place on a baking sheet that is lined with baking parchment.
  4. Mix the olive oil, mustard, maple syrup, salt and pepper to a smooth spread.
  5. Using a teaspoon, cover each Brussels sprout with a bit of the mustard maple spread.
  6. Place in the oven to bake for 30 minutes.
  7. Meanwhile, prepare he rest of the ingredients.
  8. Chop the apricots, and place in a medium bowl.
  9. Add the almond slices and raisins.
  10. Wash the oranges with hot water.
  11. Zest one of the oranges and reserve a bit of the zest to use as garnish, add the rest of the zest to the fruit mixture.
  12. Slice the peel of both ranges off and section the oranges adding the orange slices to the fruit mixture.
  13. Add a pinch of salt and pepper and lightly mix.
  14. When the Brussels sprouts are done, remove from the oven, mix with the fruit mixture and place in a large serving bowl.
  15. Garnish with the reserved zest and enjoy warm.


from Vegalicious https://ift.tt/35LfBKN
via Why You Should Consider Buying Organic Food

?Fermented foods: Health Panacea or Just Another Fad?

by Dr Megan Rossi, Registered Dietitian, Research Fellow at King’s College London and author of Eat Yourself Healthy
 
With the fermentation craze growing fast, by now perhaps you’ve dabbled in kombucha or kefir - but what actually are fermented foods and what does the science say? Here's the inside scoop on fermentation and the evidence behind the proposed health benefits.
 
What is fermentation?
 
Fermentation is when bacteria and yeast 'pre-digest' food and drink, producing a range of vitamins, beneficial organic acids and other health-promoting compounds. Generally, anything that uses microbes to transform simple ingredients fits the 'fermented food' bill. They may have boomed recently, but fermented foods have been around for thousands of years! Some of my favourites include kombucha (fermented tea), kefir (fermented milk, or sugary water if you use water grains), live yogurt and sauerkraut (fermented cabbage).
 
The health benefits: where’s the evidence?
 
Traditional fermented foods are associated with a whole host of potential benefits, including increasing vitamin concentrations (such as folate and vitamin B12), reducing anti-nutrients, lowering blood pressure, supporting our immunity and having a calming effect. Fermenting may also lower gluten and lactose content in some sourdough bread and dairy, respectively.
 
Although I am a big fan of fermented foods and anecdotally, I’ve seen first-hand the physical and mental benefits of them, with my science hat on, I must declare the clinical evidence for most types is currently limited. The exception being fermented dairy, where there is decent evidence for the health benefits across heart health, bone health, digestion and weight management. The clinical evidence aside, our ancestors have been having fermented foods for thousands of years and associating them with benefit, not to mention they are so full of flavour. So yes high-quality clinical studies need to be done, but in the meantime I do recommend people include fermented foods into their daily diet.
 
They may also contain live microbes, although it’s worth noting that’s not the case for all fermented foods, as many die off in the processing.
 
Fermenting at home: a beginner’s guide
 
Despite the rumours, fermenting is surprisingly little effort – once you’ve prepared it, you just leave it and allow the microbes to do all the hard work. You can later return to a dish that’s transformed and ready to serve. Some fermented foods (such as kimchi or sauerkraut) do require more love and care, but there are plenty of time-efficient options, including kefir, yoghurt and my sourdough wraps (recipe in my book!).
 
Before you begin, I should also make you aware that, as with dietary fibre, going from a little to a lot too quickly could make some people extra gassy (while your inner community of microbes have a feast!) so it's best to increase gradually. Chat to your GP first if you have a weakened immune system or are pregnant too.
 
 
Megan’s Favourite Kimchi Recipe, Eat Yourself Healthy, published by Penguin Life
 
An iconic condiment in Korean culture, this ancient flavour bomb is said to be one of the secrets behind the Koreans' long and healthy lives. Kimchi is known as a 'wild ferment’ as it uses the microbes naturally found on plants and in the air (versus a culture-based ferment like kefir). I love kimchi with eggs (my favourite), salads or feta on crackers – the options are endless.
 
Equipment: 500ml glass jar with lid
Ingredients (Serves 8, 40g portions)
 
Base:
  • 200g Chinese cabbage (or cabbage of choice)
  • 25g sea salt (don't worry, you won't be eating this)
 
Toppers:
  • 1 carrot (50g), grated
  • 1 spring onion, diced
  • 50g daikon radish, chopped into matchsticks
  • 1 garlic clove, finely sliced
  • 1 tsp ginger, grated
  • 1 tsp gochugaru powder, OR 1/2 tsp chilli powder and 1/2 tsp paprika
  • 1 tbsp tamari (or soy sauce)
 
Method
  1. Rinse the cabbage leaves under running water (to get rid of any residual soil) before chopping to the desired thickness.
  2. Put the cabbage and salt in a bowl. Firmly massage the salt into the cabbage.
  3. Pour 500ml of water, filtered or de-chlorinated, over the cabbage and submerge it by sitting a plate on top. Let it soak for 2 hours.
  4. Drain the soaked cabbage, and rinse three times to get rid of the excess salt. Squeeze out any excess water in the cabbage and place back in a bowl.
  5. Add all the topper ingredients and mix well, before transferring the mixture into a 500ml jar and, using your fist, punching down so there’s a layer of juice separating the raw kimchi and the air above.
  6. Place your glass weight or mini jar on top of the raw kimchi, making sure to submerge all the vegetables.
  7. Screw the lid on and leave at room temperature (ideally, 18–22°C), out of direct sunlight. Each day, check on your kimchi and release any gas that has built up by untwisting the lid a little to let it out.
  8. After 3 days (more in colder climates, less in warmer climates) your kimchi is ready for its first taste. If you’re missing that acidic bite, leave for an extra day or two.
  9. Once it’s reached your preferred flavour, pop it in the fridge with the lid sealed tight to trap in the gas, creating the fizziness of traditional kimchi. Leave it for 2 weeks to allow the flavours to develop - and enjoy!
 
 
About Dr Megan Rossi
Dr Megan Rossi (The Gut Health Doctor) is considered one the most influential gut health specialists internationally. A practicing Dietitian and Nutritionist for the last decade with an award-winning PhD in gut health, Megan is passionate about empowering others to take control of their health and happiness from the inside out. A leading Research Fellow at King’s College London and founder of The Gut Health Clinic, Megan is currently investigating nutrition-based therapies in gut health and has recently written her first book Eat Yourself Healthy, with the perfect mix of science, anecdotes and practical tips for optimal gut health and beyond.
@TheGutHealthDoctor            www.TheGutHealthDoctor.com
 

from Planet Organic Blog https://ift.tt/2ptV8K6
via How to Save Money When Buying Organic Foods

Wednesday, October 16, 2019

PAMA's Traditional Sauerkraut Recipe

Patka and Martin started PAMA Plant Based Kitchen in 2011 with their range of raw and organic wild-fermented sauerkrauts. You may recognise Patka and Martin from the several London farmers’ markets they sell their unpackaged krauts at weekly. In 2017, PAMA moved their ferment operation from east London to the serene Sheepdrove Organic Farm in Lambourn, West Berkshire, where they continue to hand make their krauts and ferments surrounded by nature and healthy air.
Here’s their recipe for a traditional sauerkraut but feel free to experiment by adding in your own fresh spices and herbs.
 
You will need:
  • 1 medium head of white cabbage
  • 2 carrots
  • 5g caraway seeds
  • 15g of Himalayan or sea salt
  • 1 litre jar, sterilised with boiling hot water
  • A weight that fits inside your jar
 
1. Finely shred the cabbage and grate the carrots into a mixing bowl.
2. Using your hands, mix the vegetables together with the salt and caraway seeds. It’s important to use sea salt or Himalayan salt for ferments as some highly processed salts can stall the fermentation process.
3. Continue to mix through until the salt is evenly distributed and the vegetables have released a lot of liquid.
4. Take your clean jar and add in the kraut mix, packing the mixture in and pouring over all the juices from the bowl. The cabbage must be kept under the surface of the liquid, so make sure there are no bits of cabbage clinging to the sides of the jar, then place your weight on top of the mixture to push everything below the surface. You can buy fermenting weights or you can improvise with a ramekin, a small dish or even a stone – it just has to be squeaky clean.
5. Close the jar and leave it to ferment at room temperature for two to four weeks, ensuring the sauerkraut is always covered with brine in the jar. You will need to undo the lid to let the air out occasionally.  
7. After two weeks, if the kraut is as sour and tangy as you like it, it’s ready to eat. Store it in the fridge after this for up to six months.


from Planet Organic Blog https://ift.tt/2nQ9TpX
via How to Save Money When Buying Organic Foods